Sunday, January 23, 2022

Information Breakdown...

 My Rx, Monster Truk, has an information breakdown...  It's an electronic component thing.  Electronics work best when they have a solid state condition, and are completely isolated from mechanical movement.  Well, some electronic components are mechanical constructions, and are still vulnerable to motion, and will breakdown with vibration.  Anything that is mechanical, and moves, will breakdown faster than solid state components.  In this case I think it is capacitors.

OK, lets extract the component that is in question, open it up, and look for some signs that we have failing components.  First we have to get the component out of the assembly in which it lives.  My RX is a Toyota product, so we have to deal with the interior constructions of a Toyota product.  First we need to pull some trim pieces out of the way...

The first piece you to get out of the way is the faux burl wood trim piece.  Looks neat, and does nothing...  It is secured with plastic clips around the perimeter.  Use a plastic trim pry tool to gently remove this trim piece.  I used my Mini Bar to get it started, and very gently indeed...
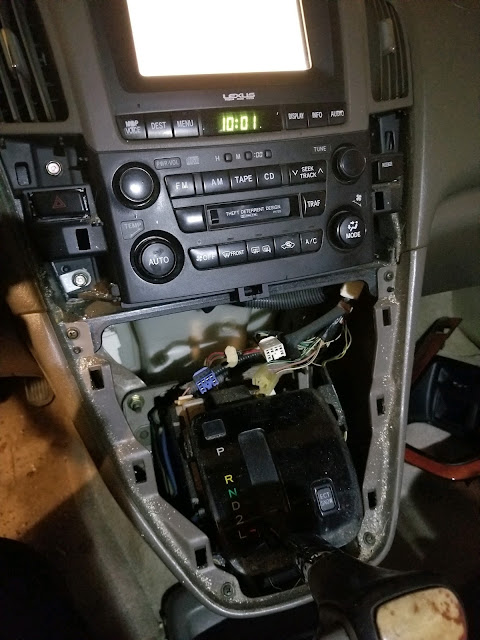
I am surprised at the amount of debris that is behind the things that I am removing.  So, there were a few electrical connectors I had to remove from the trim piece.  Next we can remove the four, ten millimeter screws that retain the radio, and the the upper part of the center console can be removed.  There are a considerable amount of electrical connections on the back side of the upper part of the center console, but they are all unique, and only go back into a singular location.  This make it much easier to reassemble.

OK, now, carefully, we pull off each connector, being very careful to not damage it, in order to liberater the center console facia from the vehicle.  Each connector has a latching tab that must be depressed in order to disconnect it from its mating connector.  When all the mating connectors are detached, then you can pull the Center Console Facia away from the body of the vehicle.

Now we can start to disassembly the upper center console, and isolate the display so that we can diagnose the breakdown.  Toyotas are very modular, and they have dedicated divisions that work on these individual parts.  Every sub-system in a Toyota has a dedicated subdivision of people working on that system.  In this case I have a multimedia display, with a touchscreen which has a fundamental breakdown.  The display, and touchscreen are contained in a module, with a part number, and you can go find them on the interwebz,,,

Here is a shot of the liberated Display Module.  You can search on the Interwebs to find this specific part number, and haz yourself a new display.  I'm gonna say that I am a little more adventurous, and I am going to troubleshoot this module down to failing components rather than just replace it. I might save a couple bucks, but, ultimately it is the knowledge of circuit failures is what I am after...


Saturday, January 8, 2022

Mechanical Pron

More Mechanical Pron... This is 4U-GSE (Toyota), and the FA20D (Subaru), 2.0 Liter, horizontally opposed four cylinder engine. It has chain driven dual overhead cams, direct fuel injection, and port fuel injection. It is a small displacement engine, but it is about as hot as you can make a normally aspirated engine which gives it an aggressive, sporty demeanor. It's horsepower rating is 205 HP at 7000 RPM, and that is a little more than 100 horsepower per liter of engine displacement. The main reason a normally aspirated engine can produce that level of horsepower is high compression, in this case 12.5 to 1. The Bang Boxes in this one are very efficient. Altogether what I am saying is... Lots of fun, especially when you are kicking the tail out...

Monday, September 6, 2021

WOPR Re-Vamped

 WOPR was running up against the limits of the old operating system, Win-Duhz-7.  I have started using a three dimensional CAD Software called FreeCAD.  This is three dimensional design, and rendering software that you can use to first design a part, then assemble the parts, and look at them with three dimensional symmetry.  This is awesome, really just what I want, design, and model three dimensional parts...  Well, Win-Duhz-7 said no...  No 3D for you....  OK, Win-Duhz-7...  You're dumpster bait...

What I have done with WOPR over the last week is a lot more than just the operating system.  WOPR was living in a salvage Dell Case, blech...  and is in need of some hardware expansion.  WOPR has plenty of disk space, but his drive is almost six years old.  So, if we are going to install a new operating system, we are going to make a fresh install, on a fresh hard drive.  The first upgrade was a Seagate Barracuda Hard Drive, 1 TB, with which we installed Win-Duhz-10.  This is in anticipation of Win-Duhz-11 coming out this Fall, Football Season, Fork Yeah!

So, WOPR gets some new dudz like a Master Cooler Case, and a ThermalTake Power Supply.  I found treasure as well.  While I was inspecting the Mainboard, and cleaning off five years of filth I found a GPU Boost switch that I had not previously seen.  Wut?  Make Grfx go Fstr?  Wut?  Wut?  OK...  Very good for 3D Stuffz...

WOPRz processor is the AMD A10, twelve Core, 4.4 GHz, 64 Bit platform, and the Asus A88XM-Plus Mainboard with 64GB memory capacity are both supporting 3D graphics functions.  WOPR is an Engineering System, with the Heart of a Gamer System.  The Cooler Master Q300L Case is fairly compact, and fits in the corner of my desktop space well.  Yet it includes many features that I want.  Efficient Cooling, Air Filtering, and good cable management are all good features.  It also has an acrylic plastic cover which lets you ogle the Hardwarez...

WOPR is Re-Reincarnated...

Monday, July 5, 2021

Drill Press Bearing

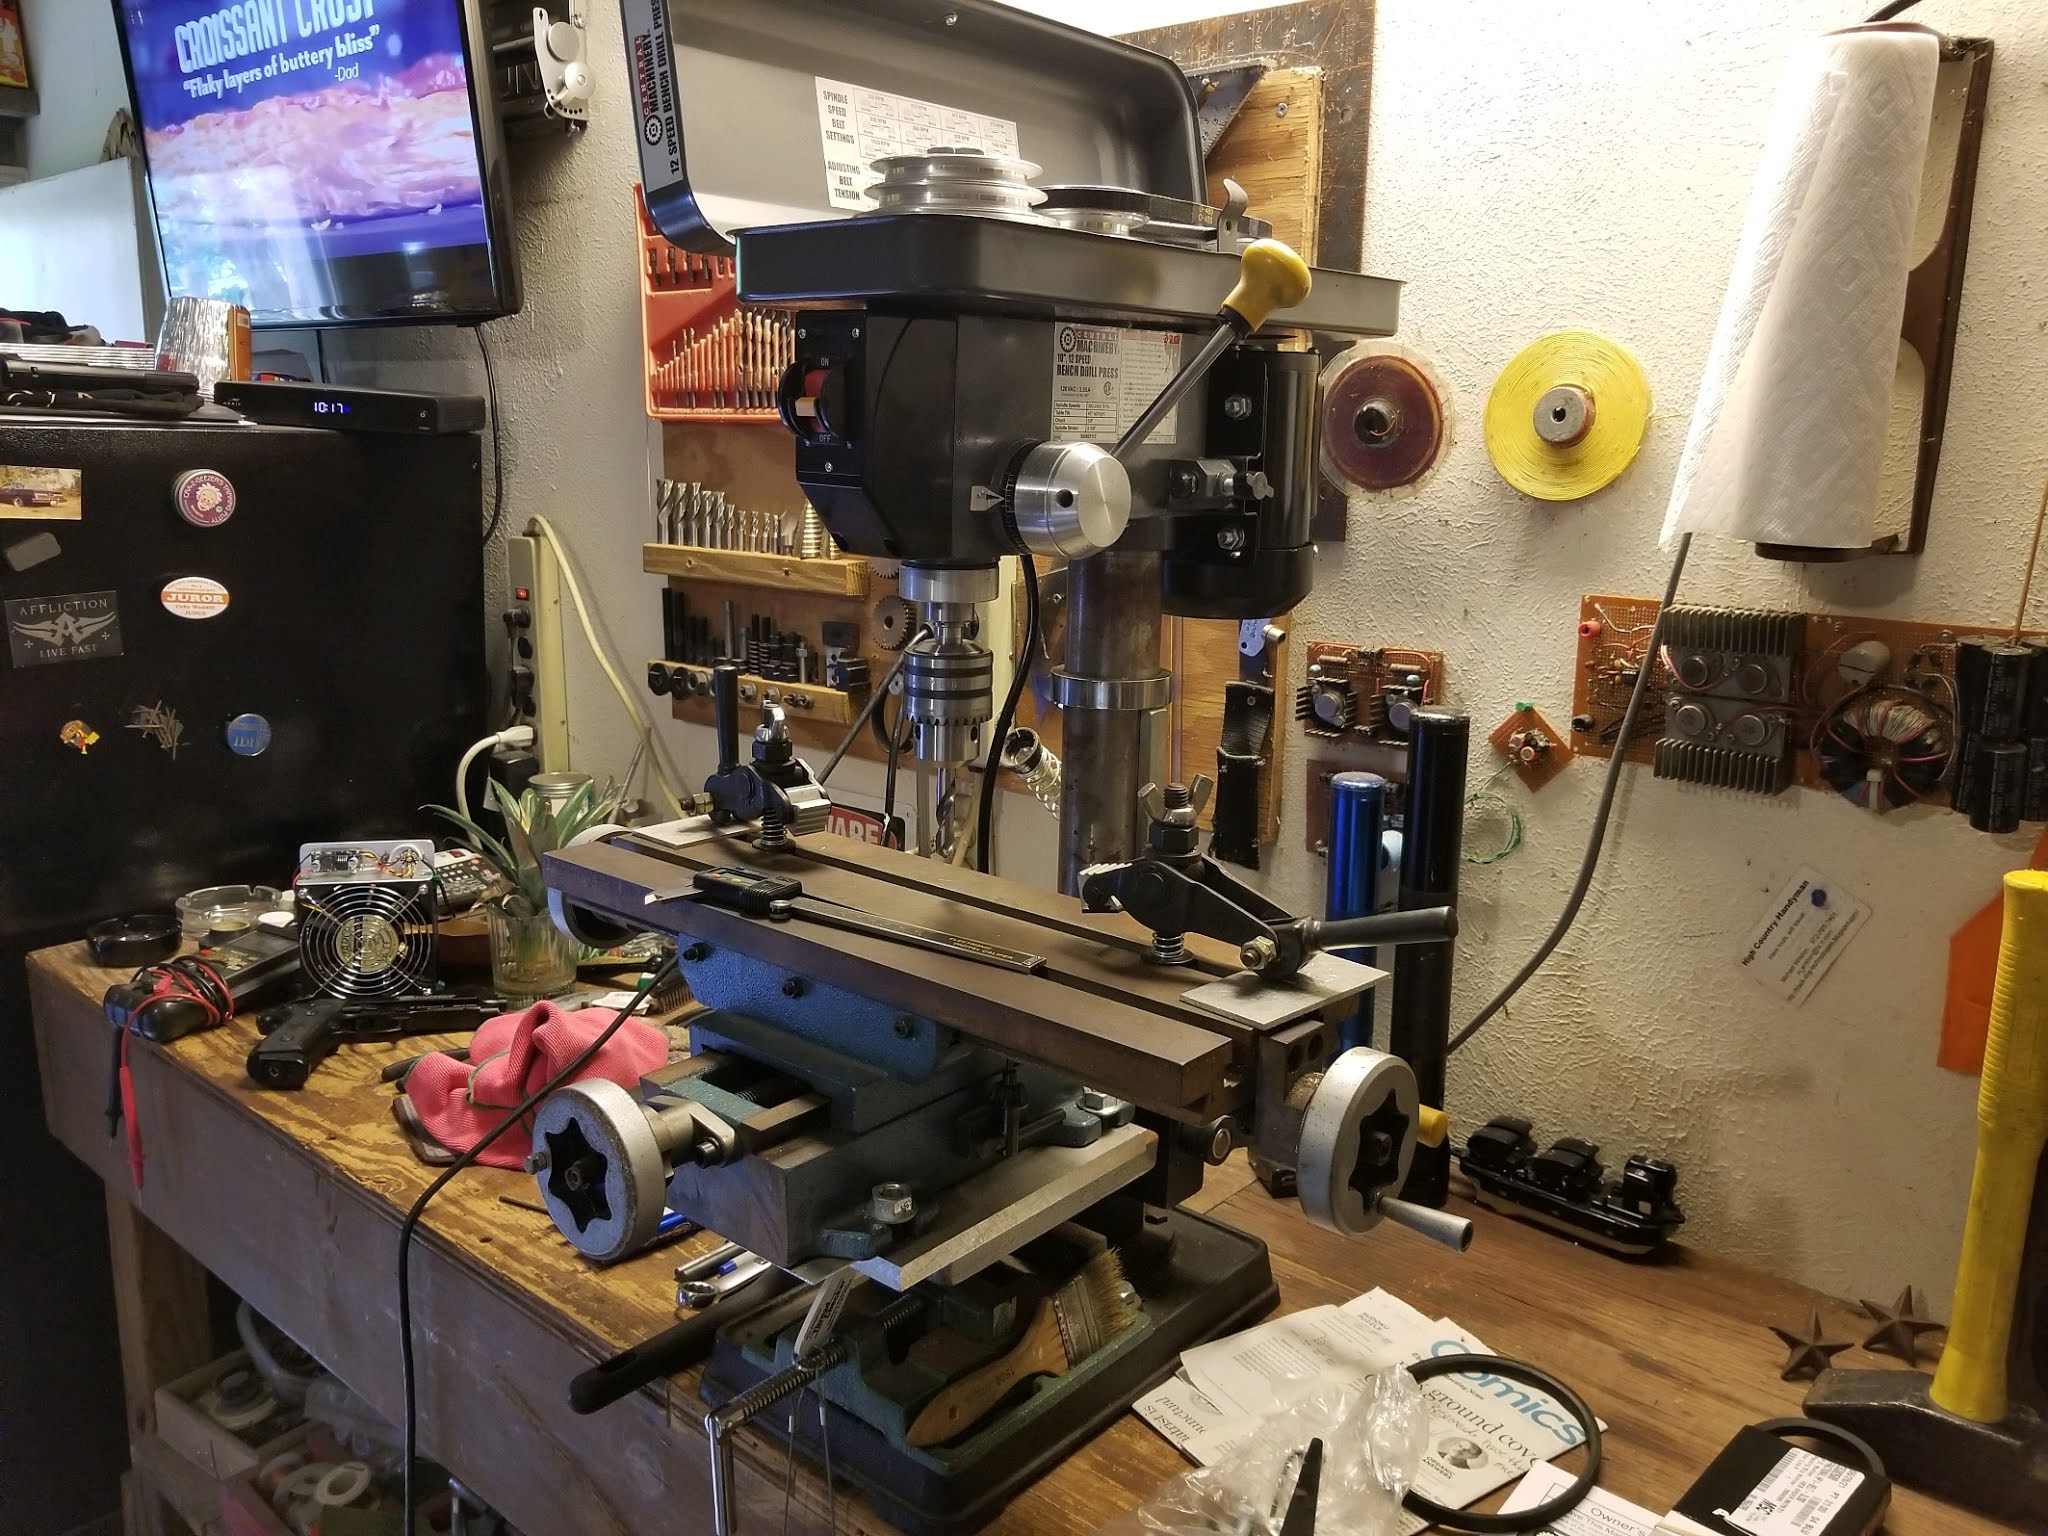
 I bought this Drill Press in July, 2010, and have been using it continuously since then.  It has been a cornerstone of my Metal Shop in fabricating multitudes of projects for many jobs, and home projects.  So, I was kinda of sad to see it loose a bearing in the drive motor.  It should be a simple fix, just replace the motor.  Well, that is where everything got difficult, and I had to get creative.  This is a shot of the Drill Press when it was new in 2010.


 It's nothing special, just a cheap bench top Drill Press from the import store.  This one got some special attention for fabricating my nefarious plans, LOL!  I added a Cross Slide Table to it so that I could do milling.  This was before I know what was possible for the little Drill Press.  Side Cut Milling doesn't work very well on a Drill Press because it's bearing are setup for plunging into the material (drilling), and not side cutting (milling).  So the Cross Slide Vice wasn't a good choice, but I soon found something that would be helpful.  This is the Mini Mill configuration with the Palmgren Milling Table.

The Palmgren Milling Table allowed me to do some limited milling, and really opened up what I could do on a Drill Press.  I could now do side cutting to clean up slots, edges, and do chamfering.  I could also now do milling processes in soft materials, like plastic, and wood.  One of my latest projects was making countersinks in a one inch thick aluminum plate, which it did easily.

So, over the last week I noticed the drive motor started making a knocking sound.  I spent some time trying to diagnose, and remedy the problem, but after a while it became apparent the bearings in the drive motor were worn out, and I needed to replace them.  Simple right?  We go over to the import store, and buy a new set of bearings, and then install them, LOL!  Your Drill Press should not make this sound...

I tried to find a replacement motor first.  Well, the import store doesn't sell a replacement motor that fits this drill press.  Huh?  Well, that's convenient...  So, I went to another place to get a replacement motor, and they had one, but it was $200.  The whole Drill Press was only $150 at the import store.  Uulgh...  So, I was kinda stuck there for a while.  I looked at replacing the entire Drill Press, perhaps a little better, and was fascinated with that for a while.  Ultimately I decided to buy the same drill press from the import store.  It was the cheapest option that would get my Mini Mill working again.

Why the heck would you want to do that?  This Drill Press has done everything that I needed it to do for 11 years.  What happened to the drive motor is an expected breakdown, and would have happened eventually, and I guess last week was it's time.  So I get a replacement motor, but also a full set of spare parts.  I can repair the bearings in the first drive motor at my leisure, and then I have a backup motor.  Also this gives me an opportunity to disassemble the spindle, and look at its bearing configuration.  Maybe I can change the bearings, and make my little Mini Mill even better at side cutting.  I have also been toying with the idea of adding stepper motors to the milling table.  OK, mo later, back to the Metal Shop...

Monday, May 31, 2021

Toilet Tank Spacer

 There is a situation where the Drain Pipe for the Toilet isn't in quite the right place, and it positions the Toilet a little too far from the wall.  Then when you install the Toilet Tank it leans back against the wall.  This put abnormal pressure on the Tank to Bowl Seal, and it will start to leak after a while.  I'm sure there have been many things used for spacers.  I found this recently, and it makes the Tank Gap a snap, LOL!

I had the Tank Gap for a long time, and wound up having Tank to Bowl seal problems, and leaks.  Mind the Gap!  er, uh, Mend the Gap?  This is a very simple, solid solution, with no hardware.  It's just a couple of molded plastic pieces that you cut to length, and press fit.  After the installation the Tank is vertical, and solid, no rocking, or shifting.

The before, and after, this is a great product...


Friday, May 14, 2021

Renewed Guitar Stand

 The Guitar Stand is getting close to 25 years old, and it showed.  The padding on the rods that hold the guitar are all dried out, and cracked.  So its time for a refresh.  The years of crud on the metals were no match for Ammonia.  It's shiny again.  As for the padding on the bars I used some automotive tubing that fit the 5/16 inch rods.  It looks cool again, and I have put automotive parts on my guitar stuff..  LOL!

Before the refresh it was looking pretty sad.  We are now in the second renaissance so it is a good time to be renewing old things.  I've been kinda busy with it...


Sunday, May 2, 2021

Another Post

Usually I am playing with Fence Posts.  This Post is a little different.  I cobbled together parts to assemble a microscope.  I have a nice Leica Microscope Head, an Illuminator, and a Swing Arm to hold the Microscope.  But, what I didn't have is the Base, and Post to hold the Swing Arm.  The Microscope is fairly difficult to use if it is not supported.  Salvage time...

So I found a one inch diameter post that has a two inch diameter aluminum mount.  There are four M6 screws that hold the post mount to the plate.  Then I also found a nice base plate which is one inch thick aluminum, but it doesn't have holes for the post mount.  Off to the machine shop...

This piece is kinda big for my Mini Mill.  I was able to clamp it to the table with no problem.  The trouble was with the Z Axis.  My regular drill bits were too long to get the aluminum piece under the bit.  I had to get some Screw Machine Length" Drill Bits.  The regular hardware stores were no help with this.  I got, "Huh?  Wuts that?"  Even at Ace...I did find what I was looking for at CDC Surplus, which is The Machinist's Candy Store over in Richardson.  Screw Machine Length Drill Bits are shorter, like Mills, and harder that regular drill bits.  They also made this job possible on the Mini Mill.

So I had to make a clearance through hole so the M6 screws could go all the way through the plate.  Then I had to make some really deep countersinks.  I wanted to use the hardware that came with the Post, and not chase down additional hardware.  This means that I had to make the countersink 0.7 inches deep.  I wanted the hardware to be recessed because the screw heads are on the bottom of the plate, but had to make them extra deep because the M6 screws were only around half an inch long.

So, this worked, and I was able to get all the screws in the first time, which is a big deal.  Measuring the part, marking the part, and getting the holes started in the right location are critical to get big pieces, and big cuts to work right the first time.  The through hole cuts were 17/64" through an inch of aluminum.  Then the countersink cuts were 7/16" through 0.7 inches of aluminum.  All four screws went in, the first time...  Score!